Coding and review workflow

This guide will show you the way around the tools and workflows we use for code review.

If you haven’t already, read the Onboarding tutorial first.

Tools

Operating system

It’s best if you work on Linux, but MacOS and Windows should generally work, as well. If you need help with setting up Linux, feel free to ask on Forum or on the SealTech Matrix/Telegram group.

Arcanist

Install ⚡ Arcanist - Phabricator CLI. It makes it easier to submit code for review.

The workflow

In Sealcode, we follow the Phabricator Workflow. We don’t push unfinished or unreviewed code to the repository - the code first goes through a review. A diff is created, reviewed, and then landed, creating a single commit including all the changes that were added during the review process, leaving the repository in a clean, linear state. It’s recommended to read the Phabricator workflow manifesto to get the reasoning behind our choice of the workflow.

Phase 1 - making changes (programmer)

You’ve picked a task, assigned it to yourself and moved it to the “Doing” column in the Kanban · Workboard.

Create a new thread on the Forum. Put a link to the task you’ve started working on. Most discussions and questions regarding the work on this task should happen on this new thread.

Get the code

Clone the repository of the project, if you haven’t already. You can find the link to the repository on the project page on Sealhub or on the thread describing the project on the Forum;

Create a new branch

Make a new branch:

$ git checkout "master"
$ git pull
$ git checkout -b "some_branch"

You can name the branch whatever you want. The branch name will not be part of the review. Remember, that you won’t be pushing the branch to the remote repository.

Make the changes

Start working on the project. Make as many commits as you want along the way.

$ git commit -a -m "checkpoint"

Test your changes

In most of our projects, there are automated tests you can run to test if your changes didn’t break something. Make sure to add new tests that check validity of your implementation of the task.

Run the tests. It usually involves just running npm run test, but make sure to consult the README.md file of the project to check for sure.

If the tests fail, make sure to fix the code and commit the changes (don’t push them!)

Check the files

Make sure you’re not including any unwanted files in your diff. Unwanted files include node_modules, some test file leftovers, compiled code, etc. Use

$ git diff --name-only $(git merge-base HEAD origin/master)

to see the list of files. If you see any files that should not be included in the diff, ignore them using .gitignore and create a new commit.

Create a new diff

Run

$ arc diff origin/master

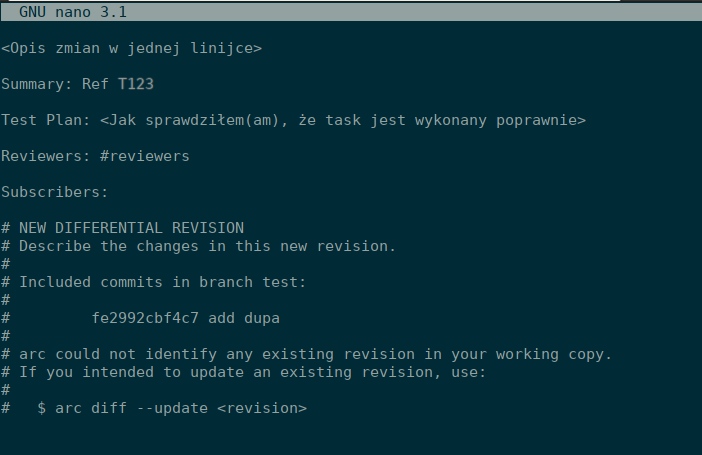
Arcanist will ask you some information about the diff you’re submitting:

The first line will become the title of the diff.

The “Summary” part is a multiline description of the changes you’ve made. Usually just referencing the task with Ref T123 is enough.

The “Test plan” line is a description of how the human reviewer is supposed to test your changes.

The Reviewers part should be set to #reviewers.

You can leave the Subscribers part empty.

Save and close the file in the editor, and Arcanist will submit the diff

Check the diff

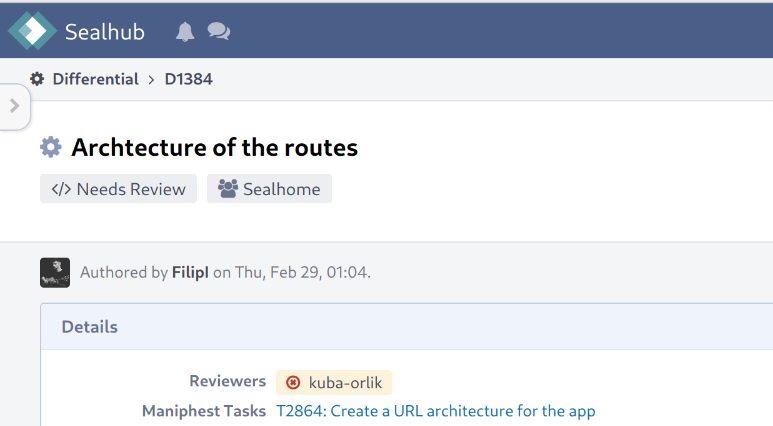
Arcanist will show you the link to the diff. Open it in your browser and double-check if everything is correct - the title, the referenced task, the code. Make any adjustments if necessary using the “Edit” option on the right.

Share a link to the diff

Post a new message on the forum thread related to this task. Add a link to the diff and let others know it’s ready for review!

And now… I wait?

You don’t have to wait for the review to be finished in order to work on another task - feel free to start work on any other task, even in the same project!

Phase 2 - Review (reviewer)

This part is meant for people who are reviewing the code.

Visit the Diff page, e.g., D100.
Familiarize yourself with the content of the tasks associated with the given Review. If there are no associated tasks, consult with the author of the Diff and ask them to properly add related tasks to that diff using the web UI.

To run the code on your local machine, check out your working branch:

$ git checkout master
$ arc patch D100

A new, local, temporary branch will be created containing the changes described in the Diff. To return to the state before the patch, simply check out to another branch.

Run the project on your machine and test the functionality, simulating user behavior.

Carefully read the code of the Diff - is it readable and understandable? Can it be improved in any way? Does it meet coding standards?

Read the Tasks linked to the Review. Does the code correctly address the task description? If there are no linked tasks, do you know why? Write all your thoughts as comments. To communicate that you think this diff should be changed before landing, use the “Request changes” option at the bottom of the view:

If you think the diff is OK, use “Accept revision”. Remember to press Submit after making your choice!

Phase 3 - applying changes (programmer)

Read all the comments that the reviewer has added to the diff. Reply to them if there are some questions in the comments.

Before starting on making changes to the code, make sure you have the diff checked out on your local repository:

$ arc patch D100

Make changes, commit and test them, and then run

arc diff --update D100 

and answer the questions that show up.

Visit the page of the diff in Sealhub. You can see the status of the diff at the top:

If the status says “Request Changes”, use the form at the bottom to request a new review of the diff:

:point_up: Here the status is “Needs review”. After running the arc diff --update command, the status of the diff should automatically change to “Needs Review”. We used to have a bug that caused the diff status not to change. It seems it’s fixed now, but if after updating the diff its status is not “Needs review”, change it manually using the form at the bottom and press “submit”:

Now the workflow goes back to Phase 2. It will ping-pong its way back and forth between 3 and 2 until it’s ready to be landed.

Phase 4 - landing (programmer)

“Landing” means merging the Diff into the working branch of the repository. To do this, execute the following commands:

$ arc patch D100
$ git fetch
$ git merge origin/master

If there were any conflicts after running the above command or if other changes were needed in the project to ensure it works correctly after the merge, execute:

$ git commit -a -m "Merge master"

WARNING: Replace D100 with the number/identifier of the diff you were working on, and replace master with the name of the main branch in the repository.

Next, carefully check if everything is working correctly - navigate through the part of the project that you have changed and, if possible, through other parts as well. If something is not working correctly, fix it or consult further steps with other individuals working on the repository.

To land the diff with the new changes pulled from the master, you need to update this diff first:

arc diff --update D100 origin/master

If non-trivial changes have been made to the code during conflict resolution or fixing new issues, the landing process is put on hold, and you need to submit the current version for review again. To do this, upload the new diff version and “request a review” at the bottom in the diff view.

If there were only trivial changes and you have confirmed that they work correctly, you can proceed with landing:

arc patch D100
arc land

In the case of no conflicts and a successful landing, the process is complete - your changes are now on the working branch.

If this diff relates to a specific task and fully completes it (sometimes one task can be split into multiple diffs), change the status of that task to resolved.